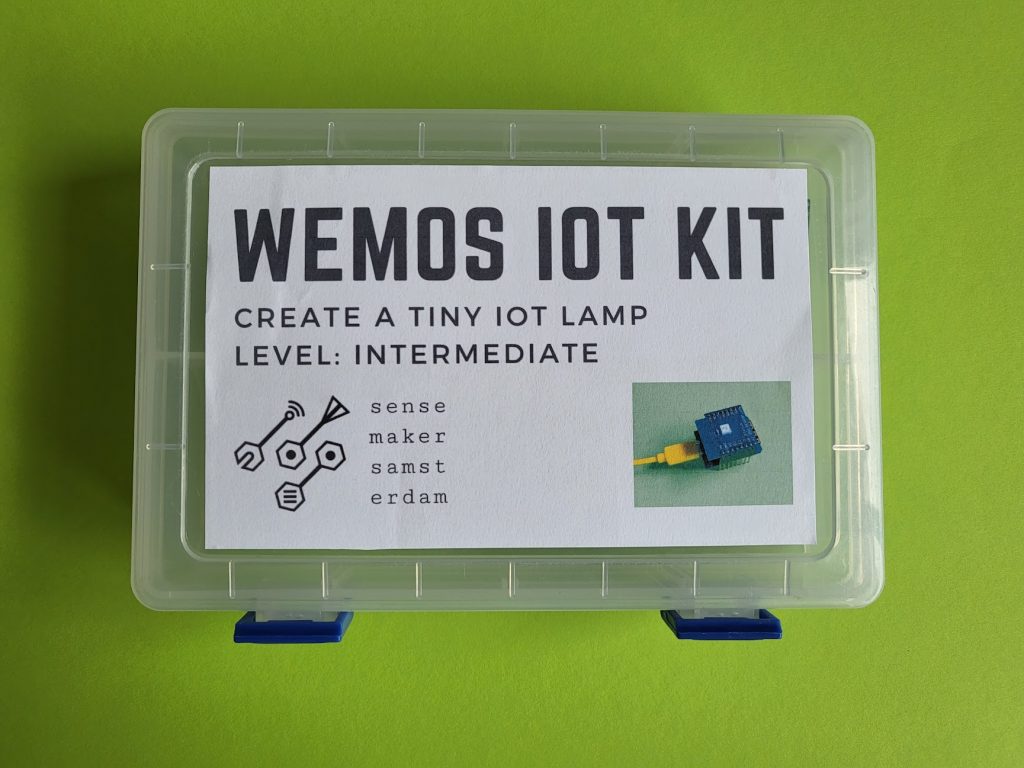
These instructions belong to the intermediate level Sensemaker DIY kit containing WEMOS D1 mini boards (ESP8266) and different shields. The official documentation can be found at here. These instructions will help you create a tiny Internet of Things lamp.
Gathering materials
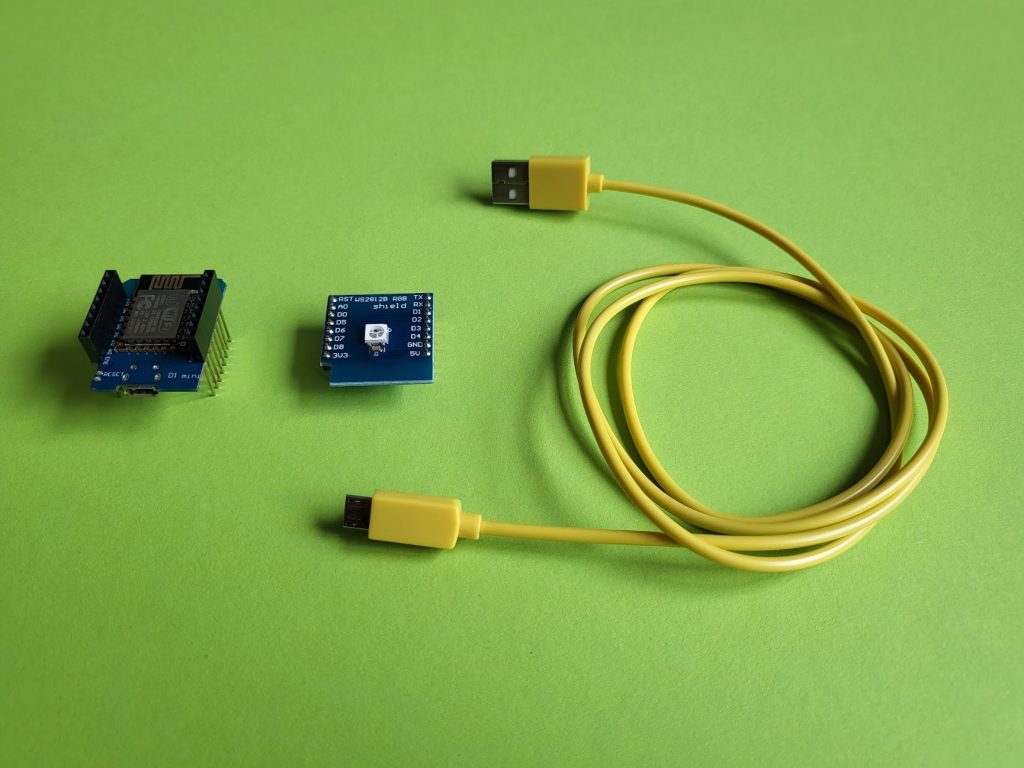
For this tutorial, you’ll need the following:
- A computer for programming
- WEMOS D1 mini (ESP8266)
- RGB shield
- Micro USB cable
Setting up the Arduino IDE
If you haven’t already, first install the Arduino IDE. To program the ESP8266 board with the Arduino IDE we have to add it to the list of available boards using the Board Manager. You can find instructions to do so here. Click Tools > Boards > ESP8266 boards and select “General ESP8266 Module”.
Now install the Adafruit Neopixel library via Sketch > Include library > Manage libraries. Search for Adafruit Neopixel and click install. Repeat this step for the ESP8266WiFi and ESP8266WebServer libraries. You will need these later on.
Setting up your hardware
Push your LED shield onto the ESP and connect a micro USB cable to it.

Plug the cable into your computer and verify that the LED cycles through different colours.
Testing your setup
To make sure everything works as intended, we will upload a simple sketch to the board. Copy and paste the following code into the Arduino IDE and upload the sketch to the board.
#include <Adafruit_NeoPixel.h>

#define LED_COUNT 1
#define LED_PIN 4
Adafruit_NeoPixel strip(LED_COUNT, LED_PIN, NEO_GRB + NEO_KHZ800);

void setup() {
  strip.begin();
  strip.show();
  strip.setBrightness(50);
}

void loop() {
  monocolor(0, 255, 0);
  delay(5000);
}

void monocolor(int r, int g, int b){
  uint32_t color = strip.Color(r, g, b);
  strip.fill(color, 0, LED_COUNT);
  strip.show();
}
Check that the LED turns green. Can you turn it blue? For now, we’ll leave this code be and come back to it later.
Connecting to a network
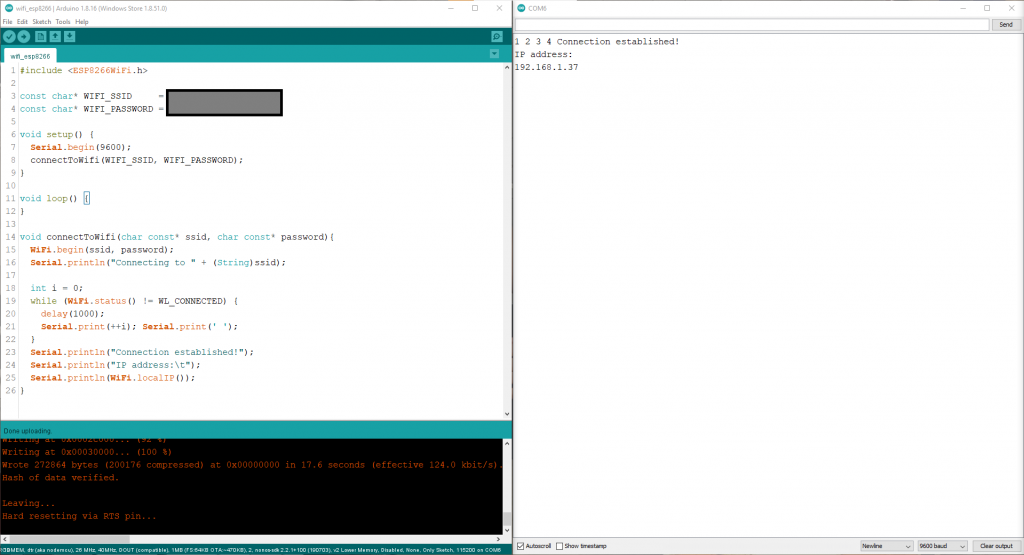
To make this a truly Internet of Things device we have to connect our ESP to the internet. To connect to your router you need the network credentials, i.e. your WiFi network name and its password. If you’re following this tutorial at one of our DIY lab evenings at the library, you can look up these credentials on the whiteboard. Fill in these details at line 3 and 4 of the following sketch and upload it to the board.
#include <ESP8266WiFi.h>

const char* WIFI_SSID     = "REPLACE_THIS_BY_YOUR_OWN_WIFI_NETWORK";
const char* WIFI_PASSWORD = "REPLACE_THIS_BY_YOUR_OWN_PASSWORD";

void setup() {
  Serial.begin(9600);
  connectToWifi(WIFI_SSID, WIFI_PASSWORD);
}

void loop() {
}

void connectToWifi(char const* ssid, char const* password){
  WiFi.begin(ssid, password);
  Serial.println("Connecting to " + (String)ssid);

  int i = 0;
  while (WiFi.status() != WL_CONNECTED) {
    delay(1000);
    Serial.print(++i); Serial.print(' ');
  }
  Serial.println("Connection established!");
  Serial.println("IP address:\t");
  Serial.println(WiFi.localIP());
}
Theory: web servers
You can skip this part of the tutorial if you’re already familiar with web servers. If you’re not, read on to find out what they do and how they work.
We want users to be able to set the LED’s colour over the internet. We will communicate via HTTP requests, which is a communication protocol that is widely used. More information can be found at its Wikipedia page. The tutorial you’re reading now was retrieved by your web browser via that same protocol.
A program that processes HTTP(S) requests is called a web server. The library ESP8266WebServer we installed honours its name and provides many functions that make it easier to set up a web server on an ESP. A server can be created with this library, after which so-called handles can be added. A handle is a function that processes requests and generates responses. The following code snippets shows how two different requests could be handled.
void handleHelloWorld() {
  server.send(200, "text/plain", "Hello Sensemaker!");
}

void handleNotFound() {
  server.send(404, "text/plain", "Incorrect handle");
}
In the first case the response will be “Hello Sensemaker!” and in the second case an error will be given back. The numbers 200 and 404 are HTTP status codes, which are part of the HTTP protocol. You’ve probably seen the number 404 somewhere when a web page could not be found, and now you finally know where it comes from!
Creating a web server
Without further ado, let’s add a web server to the previous code. Don’t forget to change the WiFi credentials once more.
#include <ESP8266WebServer.h>
#include <ESP8266WiFi.h>

const char* WIFI_SSID     = "REPLACE_THIS_BY_YOUR_OWN_WIFI_NETWORK";
const char* WIFI_PASSWORD = "REPLACE_THIS_BY_YOUR_OWN_PASSWORD";

ESP8266WebServer server(80);

void setup() {
  Serial.begin(9600);

  connectToWifi(WIFI_SSID, WIFI_PASSWORD);

  server.on("/led", handleLED);
  server.onNotFound(handleNotFound);
  server.begin();
  Serial.println("HTTP server started");
}

void loop() {
  server.handleClient();
}

void connectToWifi(char const* ssid, char const* password){
  WiFi.begin(ssid, password);
  Serial.println("Connecting to " + (String)ssid);

  int i = 0;
  while (WiFi.status() != WL_CONNECTED) {
    delay(1000);
    Serial.print(++i); Serial.print(' ');
  }
  Serial.println("Connection established!");
  Serial.println("IP address:\t");
  Serial.println(WiFi.localIP());
}

void handleLED() {
  server.send(200, "text/plain", "Hello Sensemaker!");
}

void handleNotFound() {
  server.send(404, "text/plain", "Incorrect handle");
}
Upload the sketch to your ESP and open the Serial Manager in the Arduino IDE. After connecting to the WiFi the ESP printed its IP address. In the example below the ip address equals 192.168.1.37. Our web server can be found at that address at port 80, which is the standard port for HTTP traffic. To see this in action, open a web browser and put the ip address in the address bar of your browser and press enter. You will receive the error message. If you add /led to the address you will get the response from the other handler we created.
192.168.1.37/led returns “Hello Sensemakers!”Merging the two programs
We will now add our first LED setup script to the code to host a web server. Add everything from the setup script except the loop() part. That is, add the library, the initialization of the Adafruit_Neopixel strip, the three lines in the setup and the monocolor function definition. Make sure the code still compiles by reuploading it to the board.
Controlling the LED
The function handleLED() does not yet set the LED’s colour. We will use RGB values provided by the user to call monocolor().
There are several ways to add data to a HTTP request. One way is to add parameters to the URL using a query string. By adding ? to our URL we can pass on parameters which can be processed by the handler. In our case, that means that if a user heads to 192.168.1.37/led?r=255&g=0&b=0 in a web browser, the handler processes r=255, g=0 and b=0 and the LED will turn red.
The function server.arg("parameter name") can be used to extract parameters from the URL. However, this function returns a string instead of an integer. Therefore we have to convert its value before we can pass it on to monocolor(). Replace the function handleLED() by the following snippet:
void handleLED() {
  int r = server.arg("r").toInt();
  int g = server.arg("g").toInt();
  int b = server.arg("b").toInt();
  monocolor(r, g, b);
  String message = "Hello Sensemaker! r = " + (String)r + ", g = " + (String)g + ", b = " + (String)b;
  server.send(200, "text/plain", message);
}
Upload the sketch to your ESP and hurry on to the last step!
Testing your IoT Lamp
Open a web browser and go to ip address/led?r=255&g=0&b=0. Does your lamp turn red? Congratulations! If not, time to debug your code. If you really cannot find anything wrong you can compare your script to the script at the bottom of this page.
Follow-up ideas
Want to take it up a notch? You could:
- Create a web page with a colour picker.
- Create a full-sized lamp with more LEDs. Make sure to use an appropriate power supply.
- Create LED animations. Can you recreate the rainbow cycle that was on the ESP when you first plugged it in?
- What about robustness? Ensure incorrect user input gives a meaningfull error.
- Move the SSID and passsword to a seperate file.
- Advanced: can you communicate over HTTPS?
Don’t forget there are some other shields and components available as well. Feel free to experiment and don’t forget to show off your finished project!
Completed code
#include <Adafruit_NeoPixel.h>
#include <ESP8266WebServer.h>
#include <ESP8266WiFi.h>

#define LED_COUNT 1
#define LED_PIN 4
Adafruit_NeoPixel strip(LED_COUNT, LED_PIN, NEO_GRB + NEO_KHZ800);

const char* WIFI_SSID     = "REPLACE_THIS_BY_YOUR_OWN_WIFI_NETWORK";
const char* WIFI_PASSWORD = "REPLACE_THIS_BY_YOUR_OWN_PASSWORD";

ESP8266WebServer server(80);

void setup() {
  Serial.begin(9600);

  connectToWifi(WIFI_SSID, WIFI_PASSWORD);

  server.on("/led", handleLED);
  server.onNotFound(handleNotFound);
  server.begin();
  Serial.println("HTTP server started");

  strip.begin();
  strip.show();
  strip.setBrightness(50);
}

void loop() {
  server.handleClient();
}

void connectToWifi(char const* ssid, char const* password){
  WiFi.begin(ssid, password);
  Serial.println("Connecting to " + (String)ssid);

  int i = 0;
  while (WiFi.status() != WL_CONNECTED) {
    delay(1000);
    Serial.print(++i); Serial.print(' ');
  }
  Serial.println("Connection established!");
  Serial.println("IP address:\t");
  Serial.println(WiFi.localIP());
}

void monocolor(int r, int g, int b){
  uint32_t color = strip.Color(r, g, b);
  strip.fill(color, 0, LED_COUNT);
  strip.show();
}

void handleLED() {
  int r = server.arg("r").toInt();
  int g = server.arg("g").toInt();
  int b = server.arg("b").toInt();
  monocolor(r, g, b);
  String message = "Hello Sensemaker! r = " + (String)r + ", g = " + (String)g + ", b = " + (String)b;
  server.send(200, "text/plain", message);
}

void handleNotFound() {
  server.send(404, "text/plain", "Incorrect handle");
}